This is a documentation for Board Game Arena: play board games online !
First steps with BGA Studio
Connect to the BGA Studio website
Go to BGA Studio website: http://studio.boardgamearena.com
Use your first dev account (ex: myusername0, password was sent in welcome email), and login into the website - as you would do for Board Game Arena.
If you don't have account see How to join BGA developer team?
Create a new game project
You can do most of the projects-related operations from "Control Panel / Manage games". In particular, you can create a new project automatically from there.
To open the Control Panel:
- Click on your profile icon on the top right of any page.
- Click on the Control Panel button on the top right. This is only visible if you are on a developer account.
- Click on the "Manage Games" button on the left side of the page.
Your first "game" should be one of the tutorials, so your project name should be something like "tutorialbob". Type "0" for Board Game Geek ID and click the "Create Project" button. The new project will appear after you refresh the page.
Note: At this stage it is too early to create a real game but if you really don't want to start until you have a game in mind, check Create a game in BGA Studio: Complete Walkthrough section "Select a First Game"
For reference top bar studio links
- AVAILABLE LICENSES - list of all available licenses (not public domain) - https://studio.boardgamearena.com/licensing
- STUDIO PROJECTS - list of all registered studio projects - https://studio.boardgamearena.com/projects
- CONTROL PANEL - manage projects - https://studio.boardgamearena.com/controlpanel.
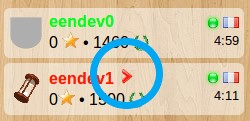
Note: the control panel is accessible from the player popup menu (top right), with the gear and bargraph blue icon next to the player icon.
Set up dev environment ide, editor and File Sync
From the initial email from the Studio you get:
- the name of the SFTP server to connect to
- your SFTP login and password
Note: this is NOT the same login/password as dev account, find email that talks about SFTP specifically
Using this information:
- Your projects will be listed in the "home" folder. If you have already created a new game project, you should see a folder with the project name be in your "home" folder.
- If you want to see tutorial projects in your folder, go to https://studio.boardgamearena.com/projects, select "Already published", search "Reversi" or any project name you want to look at, then click the "[Get readonly access]" link of this game. Once you've clicked this link, the game folder will be visible in your "home" FTP folder, in read-only.
- Connect to the SFTP server using your SFTP login and password, through your favourite SFTP client software or use IDE integraton (see File Sync or Setting_up_BGA_Development_environment_using_VSCode). Make sure to download the remote project folder into a local folder.
- If you are not sure what editor to use see Code editors and IDE,
- Note: You have to setup AUTOMATED sync between your folder and remote folder, manually ftp'ing files would be no-starter.
- Note: You can also upload your ssh key via studio control panel to avoid password exchange https://studio.boardgamearena.com/controlpanel
Let's code!
Now, you can try to launch a new game on BGA Studio from the "Play now" menu entry, as you would do on Board Game Arena website.
- To launch your game from Studio go to CONTROL PANEL -> Manage games -> <your_game> -> <your_game_page> -> Play (see how to access control panel above). You can also use link https://studio.boardgamearena.com/studiogame?game=<your_game>
- Press Create to create a table
- Select number of players and select Training mode in game configuration panel
- Click Express start. Do not use "Start game" buttons in studio - it adds unnecessary complexity of logging it from multiple accounts. When using Express start your game launches with the maximum number of players specified using your own dev player accounts (dev0, dev1, dev2, etc). If you don't see Express start button make sure you are in Manual mode for game creation. Note: for Solo mode you do actually want to use Start Game instead of Express start, the later has some issues (warnings).
- Game will open with an empty canvas: in the game zone you just have an empty div for player tables, and a fake counter space on each player panel.
- Switch to your SFTP home folder, go into your game folder. Edit the <your_game>.js file, and add a sentence in the HTML part of the line
this.getGameAreaElement().insertAdjacentHTML, then save (this assumes you mount or sync the folder). - Go back to your browser and refresh, check that the game zone has updated.
- Click the red arrow next to a test account's name in the player panel to view the game from that player's account
- Open the menu (three-line "hamburger" icon at the upper right) and choose 'Express STOP'. The game ends automatically and you are brought back to the table screen for this ended game.

Then you can modify the provided skeleton and begin to develop your game :)
Commit your changes
Committing uploads your changes on BGA's revision control system. This is an extra assurance not to lose your code, and to have the possibility to get a previous version of your code if you need to backtrack. It also helps us to follow your progress (we get an email when you commit). So you should commit from time to time, when you hit some landmark in your development.
You can automatically commit your sources in the repository from "Control Panel / Manage Games / Your game / Commit my modifications now". Then:
- Enter your commit comment (such as 'My first commit') then hit the 'Submit' button;
- Check the log for errors, it should end with the following lines:
 Transmitting file data .
 Committed revision #revision number#.
 HAL says: done.
NOTE: committing the code is currently not working until admin commits it manually the first time. Even if it does you cannot automatically deal with this version control system except for committing. Therefore its recommended to use another means of storing the code in version control system, such as local git repo or github, see Version Control
That's all!
Now you know about the basics of updating your game on BGA Studio and testing your changes.
Now you can select one of the tutorials to play with and start coding.
For links to tutorials and ALL studio documentation see Studio.