This is a documentation for Board Game Arena: play board games online !
Tips rive: Difference between revisions
(An attempt at a strategy guide to rive. Apologies for replacing the previous wiki.) |
(Added a section on effective sizes of groups) |
||
| Line 84: | Line 84: | ||
[[File:Forcedgrow.png]] | [[File:Forcedgrow.png]] | ||
==== Effective sizes ==== | |||
One other useful idea for retaining control of the game is to create a situation where a smaller group is boxed in by larger groups as below. | |||
[[File:Rive_effective_size.png]] | |||
In the above image Red is growing groups to size three, and if there was any adjacent space to the size two group touching no other groups, this growing move would be forced. However since all moves adjacent to the size two groups (the spots marked with X's) are also adjacent to size three groups, you can effectively treat this size two group as though it were size three for the purposes of growing groups. | |||
In this situation all moves become legal again, because every move touches a size 3 group, similar to when there are only size three groups on the board. | |||
Red can now remove the size two group by merging with the one of size three groups and continue on to growing size 4 groups. | |||
==== 2nd line stones and removing from the edges ==== | ==== 2nd line stones and removing from the edges ==== | ||
Latest revision as of 13:33, 23 March 2023
It's worth playing a few games of Rive first, reading and absorbing the rules.
In short the key points of the rules are:
(0). groups are connected adjacent stones where the colour is unimportant.
(1). Singletons must be played when possible.
(2). Stones can only be placed which are adjacent to up to three groups where the largest group is as small as possible.
(3). When you join groups (capturing placement) you need to remove stones from the newly merged group to make it one larger than the largest group being merged. You must play again after this type of placement.
It can take some time to absorb how this works in practice and what it means for the gameplay, but below it will detail some consequences of the rules, how the game breaks up into phases from these rules, and how one can try to tactically keep control of the initiative or momentum in the game.
Phase 1: Singletons
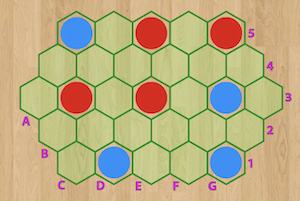
Players must place singletons at the start of the game until no more singletons are possible to place as per point (1) above. In this phase you want to force your opponent to play the last singleton so you will have the chance to merge singletons and keep control of the game. This is an example of the end of the singleton phase, any new stone will touch at least one singleton.
Winning the singleton phase
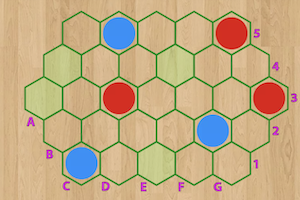
In order to "win" the singleton phase, that is have the first move at the end of this phase, you need to force the opponent to play the last singleton. One way to achieve this is to create a situation where your opponent is to move but there's an odd number of single placements left, 1,3,5 etc as in the example below. It's red to move, and there's an odd number of placements left so blue is winning.
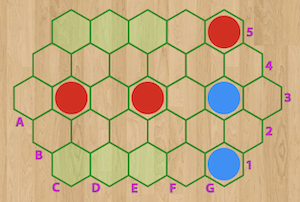
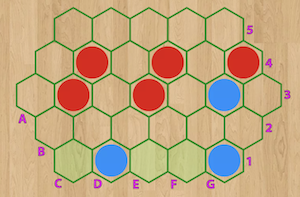
This was the simplest case, but knowing this you can start to learn additional shapes and predict which player has the advantage. For example if there are two straight or slightly bent 3 shapes as in the image below, the player to move is "losing" in the opening.
In this case blue has to make a move, if they play in the centre of the three spaces, red can play on the corner of the opposite 3 space and leave the last move for blue. Similarly if blue plays on an edge, red can play in the centre on the opposite three spaces. So this is a 'winning' position for the second player.
You can work out similar examples in your own games, an easy follow on would be to work out who is winning if there's two of these straight threes and a singleton space as well.
Phase 2: Group building and merging
After all the singletons are placed one player will then have the option to either play adjacent to a singleton or join two singletons and then remove one of the two stones as per point (3) above, two is one larger than the merged singletons.
One simple strategy in this phase will be to try to build all of the groups up a level at a time and retain control of the initiative. You might grow the singletons all to size 2, then afterward grow the groups to size 3, 4, 5 etc. Typically you'd like to remove as many of your opponents stones as you can, but that not might always be advisable. Sometimes you'll have to remove your own stones for a better position first.
For instance in the above game at the end of all the singletons the player in control might try to merge many of the singletons into size 2 groups as below.
It can be the case that you can no longer merge any groups, for instance because they are far apart, or possibly you don't want to merge them because it will give the opponent the initiative to decide the next sequence of moves.
There's a useful tactic in the situation above.
Parallel Growing of groups
You can use point (2) above to control where the opponent can play in certain situations in the game, either by forcing them to place a singleton, which we'll see in the next section, or you can force them to grow a particular group. In this case red played F1 and blue is now forced to grow the other singleton group to size 2, since this would be the group that is as small as possible - they're not allowed to play a move adjacent to both a singleton and size 2 group for instance.
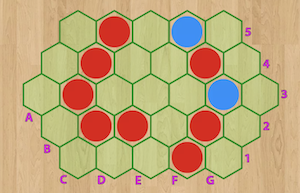
Another example where the player to move (it was red in this case), can parallel grow the two size 3 groups into size 4 groups which is forced by point (2).
This can be useful at many places in this phase in the game, but one point in particular where it is pretty useful is in ending the game and transitioning to the last phase of the game.
In the example above, it has reached a point with only two large equally sized groups. It was red to play, and red can now parallel grow both groups, red grows one, and blue is forced to grow the other by point (2) again.
The reason why you might want to parallel grow these groups is that when merged you'll need to remove more stones, the larger the groups being merged.
A merging rule of thumb would be:
If merging two size N groups you will need to remove N stones.
So in the above case merging two size 5 groups requires removing 6 stones and freeing up a lot of empty space.
Here's two more tactics that one can use when merging groups.
Forced singletons and growing
In order to retain initiative, momentum, control of the flow of the game, you want to make sure that when you open new space, your opponent is forced to place the last move and doesn't have the option to merge groups.
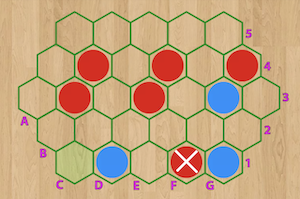
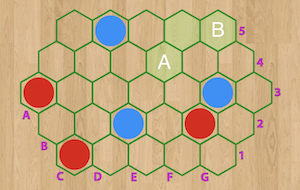
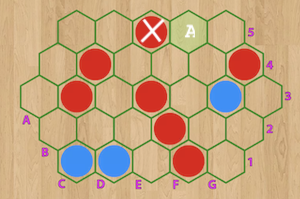
Similar to phase 1, one way to do this is to force them to place a singleton. In the example below blue merged singletons to create a size 2 group and open up a space of size 3. If they play at A, then red will be forced to play at B or vice versa, which gives blue back control to make the next merging move etc.
Similar to this one can also force the opponent to grow the only group of a certain size, be that a singleton or large size group using point (2) above. So in the following position below red merged groups to make a size 3 group, leaving two adjacent empty spaces and had to play a singleton, the piece marked X. However since this is the only singleton, and there is a space available which doesn't touch other groups, blue is forced to grow the singleton with the move at A.
Effective sizes
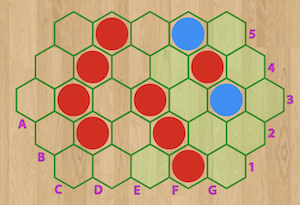
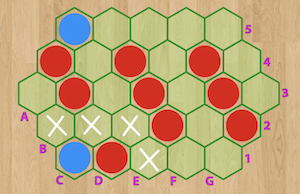
One other useful idea for retaining control of the game is to create a situation where a smaller group is boxed in by larger groups as below.
In the above image Red is growing groups to size three, and if there was any adjacent space to the size two group touching no other groups, this growing move would be forced. However since all moves adjacent to the size two groups (the spots marked with X's) are also adjacent to size three groups, you can effectively treat this size two group as though it were size three for the purposes of growing groups.
In this situation all moves become legal again, because every move touches a size 3 group, similar to when there are only size three groups on the board.
Red can now remove the size two group by merging with the one of size three groups and continue on to growing size 4 groups.
2nd line stones and removing from the edges
It can be useful to control and keep stones on the second line of the board, that is the second from outermost ring on the board. The reason for this is that since it is adjacent to the edge, new stones placed there will have touch the second line stone(s) and that might mean forbidding these edge moves from being legal. This can be useful to keep initiative in the game, controlling legal moves.
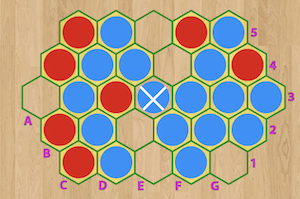
For example in the position below blue has just joined two large groups of size 11 so 11 stones will need to be removed.
In this example it will be good for blue to remove as many red stones as possible, and in particular to remove stones from the edges in order to move the game into the third and final phase. So for example removing edge stones and keeping second line stones will set blue up for a win. This example will be continued in phase 3 along with another example.
Phase 3: Filling in
As mentioned previously there is a third phase of the game. This is where there is just one large group with no room for singletons or other smaller groups on the board. All future moves will have to grow this group, and this group is as small as possible being the only group.
Blue preferentially removed red pieces and pieces around the edges, and so now both players would take turns placing one stone at a time to grow this group by 1. However red can't catch up on blue at this point, since both players will increase their score by 1 until the game ends. So the result is already decided.
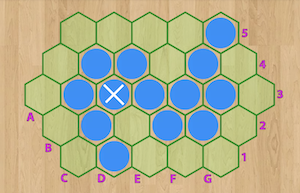
Here's another situation where both players have 5 stones each, and the game has reached phase 3. The next player to move wins, since the score difference won't change with each pair of moves, but there's an odd number of points on the board, and so and odd number of moves left.
Taking turns filling in blue wins by 1 point.
