This is a documentation for Board Game Arena: play board games online !
Tips bandido: Difference between revisions
(+1tip: pattern F over II) |
(Separated into sections + New trap section and remove of old one + 5 pictures + need someone for shaping) |
||
| Line 1: | Line 1: | ||
=== General: === | |||
Familiarize yourself with all the tiles as quickly as possible so you know the possibilities. | Familiarize yourself with all the tiles as quickly as possible so you know the possibilities. | ||
| Line 35: | Line 36: | ||
Be careful of the constraints that develop if you add tiles to a confined area. You’ll lose the game if you can’t close or route the tunnel out of the confined area. Try to point new open ends away from confined space so you’re less likely to encounter constraints with tiles that follow (unless you are building a trap intentionally as described below). | Be careful of the constraints that develop if you add tiles to a confined area. You’ll lose the game if you can’t close or route the tunnel out of the confined area. Try to point new open ends away from confined space so you’re less likely to encounter constraints with tiles that follow (unless you are building a trap intentionally as described below). | ||
=== Traps: === | |||
An advanced and enjoyable technique is to create a "trap"; i.e. a completely enclosed space which can only be filled by a specific tile. | |||
This let you close everything except the trap first, then close the trap. One of the upside is that the exits which are part of the trap don't need to be closed immediately. Another one is that if you can close a trap with one of your cards, you can keep it in hand, which let you when there is only one exit left outside of the traps, make you 'pass your turn' by closing the trap, or close the single exit left, hope your teammate can't play in the trap, and then close the trap. | |||
Traps of size | |||
Traps are good early on because many tiles can fill it. More the game advance, and less traps are effectives. | |||
[[File:Trap4.jpg|left|thumb]] | |||
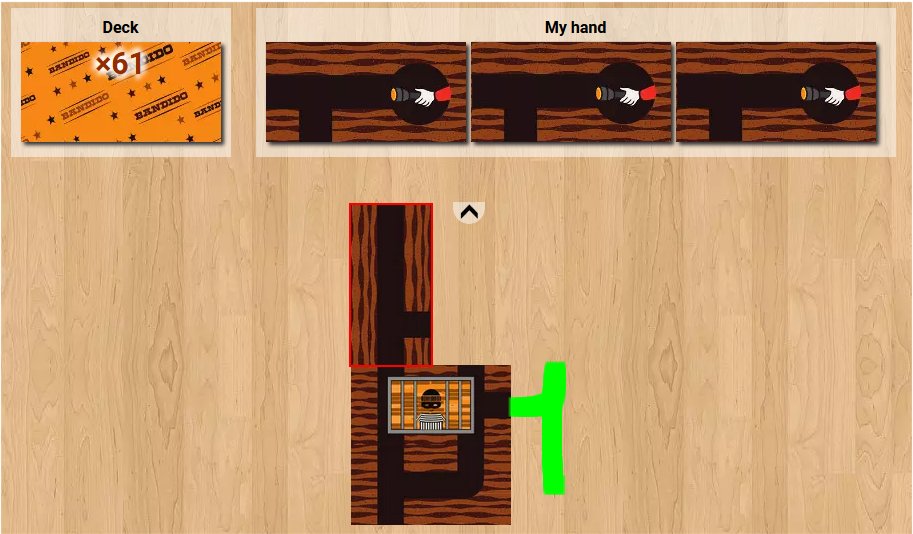
If at any point, you got a trap of size 1x1 like prsented here, or if there is no tiles remaining to fill the gap, the game is immediately lost. | |||
[[File:Trap1.jpg|left|thumb]] | |||
The most commun is the "3-ways trap". Since tiles have 4 exits at most, in worst case, that trap will give a single exit after being filled. | |||
[[File:Trap2.jpg|left|thumb]] | |||
The second most commun is the "2-ways trap". Far worst, many tiles can fill the gap on it while still leaving 1 or 2 exits. You shouldn't force it, but if you got a nice tile to play and create that trap, this look good. | |||
If already one trap of that type is present, I strongly advise you to avoid create another one. | |||
[[File:Trap3.jpg|left|thumb]] | |||
The third one can have various patterns, point is, you got an empty space of size 1x2. Before doing it, you need to check if the tile missing is still present on the deck. | |||
Note that you kinda remove one of copy of that tile on the deck. Which mean the presented trap here isn't great since the tile missing is a pretty good tile to use somewhere else. | |||
[[File:Trap5.jpg|left|thumb]] | |||
This pattern is great, you got a single exit which lead to a 2x1 space under it. This isn't a trap, but it let you easily create the one above it. | |||
When there is few exits left, you can either close it normally, or create a trap and play an annoying card, sometimes while leaving no new exits outside of the trap, and make the next player play. | |||
Traps of size 2x2 are mostly safes. The probability to lose with them is really low: it's when you play a tile which make the remaining trap have no copies left, or have 5 or 6 exits. | |||
=== Patterns: === | |||
Revision as of 05:48, 1 April 2023
General:
Familiarize yourself with all the tiles as quickly as possible so you know the possibilities.
At the beginning of your turn, select and rotate each of your tiles in order to preview all of your options. Take care not to double click until you are ready to commit to a placement.
In general, try to join or extend tunnels rather than splitting them. One exception is if you create a branching situation that you or a teammate can quickly resolve with a complementary piece. Another exception is if you must either split the tunnel or waste a valuable piece without confidence that the tunnel will soon be closed; in this case it is sometimes preferable to split the tunnel.
If you need to play a tile that adds exits, try to align open ends in a parallel or perpendicular grouping which can then be closed or combined with complementary tiles.
If the tunnels start to branch too much to contain, switch to using ends sparingly and strategically. An example of strategic use would be to close a tunnel that is far from all others. An example of a wasteful use would be to use a corner end or T end to simply extend a line - only do this if you are confident that someone can close the tunnel within the round.
Remember, there are only two of each tunnel type and three of each end type in the standard game. Keep track of what has been used and what is still available. If you need to, search the table to make sure a piece is available before you create a situation that requires a specific piece. The "wood grain" design always follows the length of the tile; this will help you distinguish each tile from adjacent tiles.
Try to direct tunnels toward each other and keep the exits close to each other so that they may be joined if possible.
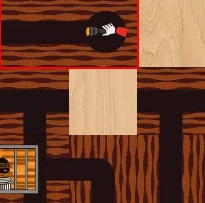
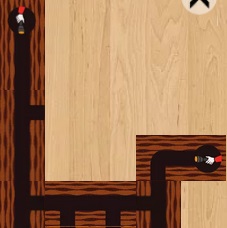
Like on this picture where playing that tile the other way around will make the two exits way further:
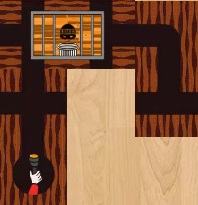
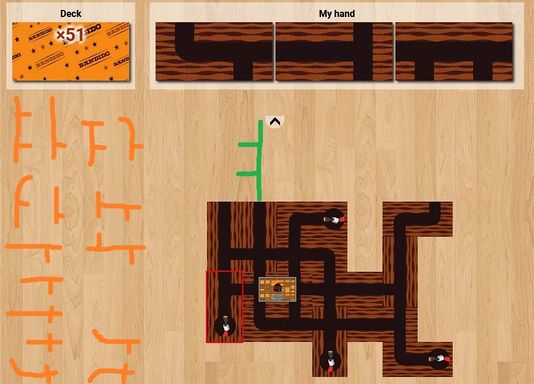
On this one, you play it like that to make the exits the most close possible. Furthermore, you have the possibility to get the third exit in the top maybe. Don't force it, but it's an upside:
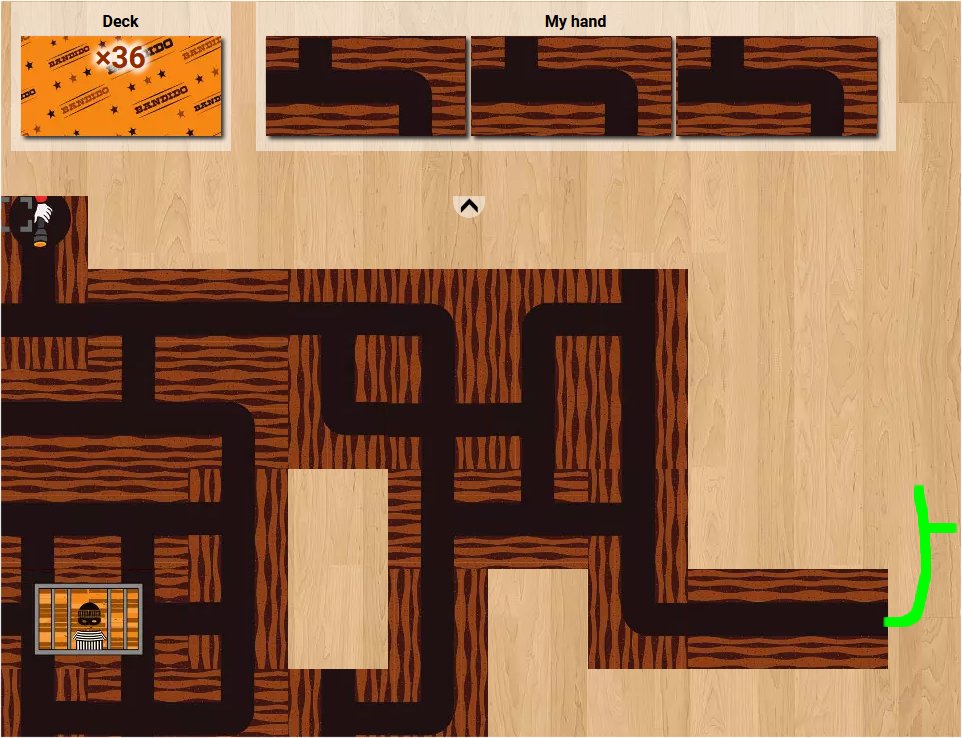
There are only two I, S, and Z tiles, so joining distant exits is not likely to work.
If the game isn't close to be finished, use your annoying tiles first, even if their position isn't great. By doing so, you assure yourself to have better tiles when you will need them the most. The game is a succession of weak moment where everyone try to have a good hand, and some strong ones when everyone try to win the game.
Try to intuit what your teammates are attempting to accomplish. A very basic example: If you see a teammate laying parallel lines, try to maintain the parallel lines until a U can close them. The more familiar you are with the deck, the more easily you can see your teammate(s) building an arrangement that can be resolved nicely by a few specific pieces. If the perfect piece to resolve a situation is still out there somewhere but you don't have it, try to play somewhere else and be patient. The right piece will come, or maybe your teammate already has it!
Be careful of the constraints that develop if you add tiles to a confined area. You’ll lose the game if you can’t close or route the tunnel out of the confined area. Try to point new open ends away from confined space so you’re less likely to encounter constraints with tiles that follow (unless you are building a trap intentionally as described below).
Traps:
An advanced and enjoyable technique is to create a "trap"; i.e. a completely enclosed space which can only be filled by a specific tile.
This let you close everything except the trap first, then close the trap. One of the upside is that the exits which are part of the trap don't need to be closed immediately. Another one is that if you can close a trap with one of your cards, you can keep it in hand, which let you when there is only one exit left outside of the traps, make you 'pass your turn' by closing the trap, or close the single exit left, hope your teammate can't play in the trap, and then close the trap.
Traps are good early on because many tiles can fill it. More the game advance, and less traps are effectives.
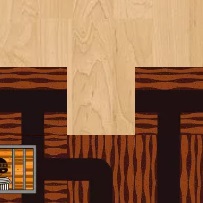
If at any point, you got a trap of size 1x1 like prsented here, or if there is no tiles remaining to fill the gap, the game is immediately lost.
The most commun is the "3-ways trap". Since tiles have 4 exits at most, in worst case, that trap will give a single exit after being filled.
The second most commun is the "2-ways trap". Far worst, many tiles can fill the gap on it while still leaving 1 or 2 exits. You shouldn't force it, but if you got a nice tile to play and create that trap, this look good.
If already one trap of that type is present, I strongly advise you to avoid create another one.
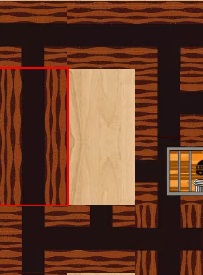
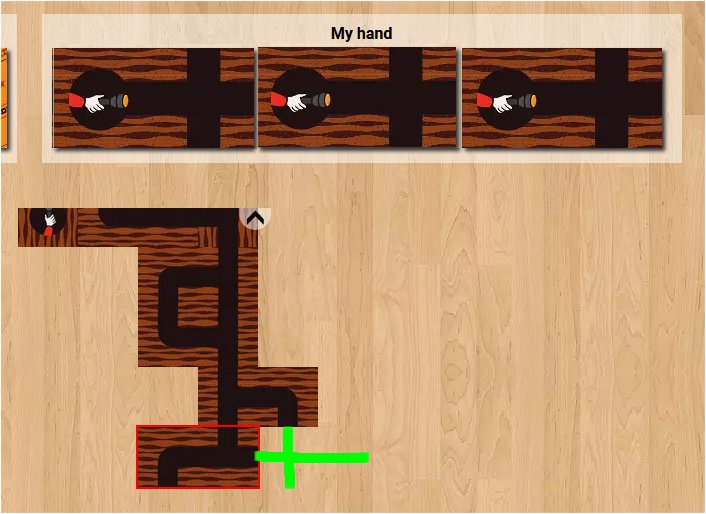
The third one can have various patterns, point is, you got an empty space of size 1x2. Before doing it, you need to check if the tile missing is still present on the deck.
Note that you kinda remove one of copy of that tile on the deck. Which mean the presented trap here isn't great since the tile missing is a pretty good tile to use somewhere else.
This pattern is great, you got a single exit which lead to a 2x1 space under it. This isn't a trap, but it let you easily create the one above it.
When there is few exits left, you can either close it normally, or create a trap and play an annoying card, sometimes while leaving no new exits outside of the trap, and make the next player play.
Traps of size 2x2 are mostly safes. The probability to lose with them is really low: it's when you play a tile which make the remaining trap have no copies left, or have 5 or 6 exits.
Patterns:
If you are experienced, by following this strategy, you will see that often times, you will finish by having only annoying tiles and one exit left, and be forced to use that annoying tile. To reduce the amount of time you or your teammates will be forced to do that, you want to create various empty places for each player. Some 'U', some corners '┘', and even some 'L' (so with two exits not at the same 1x1 tile). Going straigth up for the move which give the less exits is regulary not optimal. On that example, you want to give your teammate(s) a maximum amount of options. Here there are 4 single exits, so you want to play your three exit tile, which will give more options to your teammate:
I will insist on that part, since many master players don't do it, when having this hand, doing this is better. Playing that last tile the 'normal way' will create three unique path III, which isn't good.
On the other hand doing this create two II, and one F. And F are extremely valuable, because many of the other tiles can be played on it. You can see on the left most of the tiles which goes nicely on it. And most of them are not easy to use.
So rarely it will backfire to you, but often, you will be able to play one or two complicated tiles on it.
Even if winning seems unlikely, play your best and don't give up. Games can be won even in the very last round with an empty deck!
